Quick Tip: Running WildFly Docker Image on OpenShift Origin
On to a new week. There's been plenty of travel for me recently, and it don't stop soon. But I have some time to try out OpenShift Origin and run it on my Windows environment. There is an entry level blog-post how to setup everything from a couple of days ago. Now it was about time to just run a vanilla Docker image on it.
Prerequisites
Get your Origin installation up and running. And make sure to also install the OpenShift binaries locally. The OpenShift team released the all in one vm on a separate, developer friendly and good looking website a couple of days after my post. So, all you need to remember is this address: http://www.openshift.org/vm/
Get your OpenShift Environment Up
This is a single vagrant up command. If that succeeded, you should be able to access the local admin-console via your browser at http://localhost:8443/ and also login with the client tools from the command line:
Create A Project And Run WildFly
First thing to do is to create a new OpenShift project. We want to separate this a bit from the default. At the end, think of it as a namespace in which we can just play around a bit:
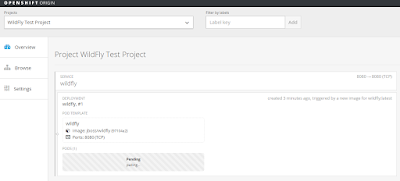
Depending on your connection, this might take some time. But when it's finished, you will see a green bar that states "Running" and also shows an IP-address. Let's see, if everything went well and the WildFly instance is up and running. We do need to see the logs for our pod. Let's list them:

The only thing left to do now is to change the port-forwarding rules in the VirtualBox console. Add the port 80 from the host to the guest.
Now you can access the WildFly instance via http://wildfly.openshiftdev.local/. Congratulations!

Trouble Shooting
If you're running anything else than the all-in-on-vm, for example the fabric8 vagrant image, you will need to change the security settings in OpenShift. Ssh into the instance, login via the oc command line and edit the security settings:
Prerequisites
Get your Origin installation up and running. And make sure to also install the OpenShift binaries locally. The OpenShift team released the all in one vm on a separate, developer friendly and good looking website a couple of days after my post. So, all you need to remember is this address: http://www.openshift.org/vm/
Get your OpenShift Environment Up
This is a single vagrant up command. If that succeeded, you should be able to access the local admin-console via your browser at http://localhost:8443/ and also login with the client tools from the command line:
oc login http://localhost:8443
Create A Project And Run WildFly
First thing to do is to create a new OpenShift project. We want to separate this a bit from the default. At the end, think of it as a namespace in which we can just play around a bit:
oc new-project wildfly-tests --description="WildFly and Docker on OpenShift v3" --display-name="WildFly Test Project"
oc new-app --docker-image=jboss/wildfly

Depending on your connection, this might take some time. But when it's finished, you will see a green bar that states "Running" and also shows an IP-address. Let's see, if everything went well and the WildFly instance is up and running. We do need to see the logs for our pod. Let's list them:
oc get pods
NAME              READY     STATUS    RESTARTS   AGE
wildfly-1-jzvsj   1/1       Running   0          11m
oc logs wildfly-1-jzvsj
127.0.0.1 wildfly.openshiftdev.local
oc expose service wildfly --hostname=wildfly.openshiftdev.local

The only thing left to do now is to change the port-forwarding rules in the VirtualBox console. Add the port 80 from the host to the guest.
Now you can access the WildFly instance via http://wildfly.openshiftdev.local/. Congratulations!

Trouble Shooting
If you're running anything else than the all-in-on-vm, for example the fabric8 vagrant image, you will need to change the security settings in OpenShift. Ssh into the instance, login via the oc command line and edit the security settings:
oc edit scc restricted

Post a Comment