The Java EE 6 Example - Running Galleria on GlassFish 3.1.2 - Part 2
You hopefully have seen my last post about Vineet's DDD Java EE 6 example. If not, take a look. It introduces you to the overall example and might be helpful with this and the following posts. Today we are going to setup the example as it is directly with latest GlassFish 3.1.2, Hibernate and Derby.
Preparation
Get yourself in the mood for some configuration. Grep the latest NetBeans 7.1 (the Java EE edition already includes the needed GlassFish 3.1.2) and install it. I also assume you have a decent Java SDK 7 (6 would do the job, too) in place somewhere. Depending on the development strategy you also need a Mercurial Client and Maven. At least Maven is also included in NetBeans, so ... I mean ... why make your life harder than it already is? ;)
Environments
Some few more words about the environments. This example was setup for supporting different environments. Starting with the plain "development" environment you also need to configure your "test" and last but not least the "production" environment. All of the different environments are handled by maven profiles, so you might have to configure a bit during the following minutes.
Create the Database instances
First thing to do is to decide where to put all your stuff. The examples use derby out of the box and therefore you should either have the Java DB installed (part of the JDK) or use the GlassFish derby instance which is pre-configured with NetBeans. Let's make it harder here and assume we use the Java DB installation that comes with your JDK. Go ahead, open a CMD prompt and navigate to your %JAVA_HOME% folder and further down the db folder/bin. Execute the "startNetWorkServer" script and watch out for the derby instance to start. Now open another CMD prompt also navigate to the db/bin folder and execute the "ij" script. This should come up with a prompt " ij>. Now enter the following connect string:
This command connects you to the derby instance and creates a GALLERIATEST database if it doesn't already exist. The Galleria example uses a handy little tool called dbdeploy as a database change management tool. It let's you do incremental updates to the physical database model which get tracked in a changelog table. (More about this later in the series). You have to create the changelog table:
And if you don't like this approach. Fire up NetBeans, switch to the services tab, select "New Connection" and add a new Java DB Network Connection with host:localhost, port:1527 and Database: GALLERIATEST;create=true. Set both user and password to "APP" and click "Test Connection". Select APP as the schema for your new DB. And you are done!

Create the GlassFish domain
We are running this from latest GlassFish. First thing to do now is to create a new domain. navigate to your GlassFish installation directory and goto glassfish3/bin and execute the following:
We are now going to add the created derby database as a connection pool to you newly created GlassFish domain. Navigate to the <resources> element and add the following connection pool and jdbc-resource under the last closing </jdbc-connection-pool> element:
Getting the Source and opening it in NetBeans
 Vineet is hosting the Galleria example on bitbucket.org. So, you have to go there and visit the java-ee-6-galleria project. There are three ways you can bring the sources to your local HDD. Either via the hg command line:
If you try to build the project you will run into trouble. It is still missing some configuration which we are going to do next.
Adding a Development Profile
Next is to add some stuff to the Maven pom.xml of the galleria-ejb project. Open it and scroll down to the <profiles> section. You find two (sonar and production). We are going to add a development profile by adding the following lines to it (make sure to adjust the GlassFish paths to your environment):
Testing the ejb-Galleria Project
Lets try to run the testcases in the ejb-Galleria project. Right click it and issue a "clean and build".Follow the console output to see what is actually going on. We are going to investigate this a little bit further with one of the next posts. Today we are only doing this to make sure, you have everything setup the right way. It should finish with:
Build and Deploy the Project
Now go to NetBeans "Tools > Options > Miscellaneous > Maven" and check the box that says: "Skip Tests for any build executions not directly related to testing". Return to the main window and right click the Galleria project and make a clean and build there.
Fine. Now lets fire up the GlassFish domain. Switch to your GlassFish installation and find the glassfish3/bin folder. Open a command line prompt there and run:

The next parts in the series will dive you into the details of the application. I am going to cover the tests and overall concepts. And we are also going to change both JPA provider and database in a future post.
Want to know what it takes to get it up and running on latest WebLogic 12c ? Read on!
Preparation
Get yourself in the mood for some configuration. Grep the latest NetBeans 7.1 (the Java EE edition already includes the needed GlassFish 3.1.2) and install it. I also assume you have a decent Java SDK 7 (6 would do the job, too) in place somewhere. Depending on the development strategy you also need a Mercurial Client and Maven. At least Maven is also included in NetBeans, so ... I mean ... why make your life harder than it already is? ;)
Environments
Some few more words about the environments. This example was setup for supporting different environments. Starting with the plain "development" environment you also need to configure your "test" and last but not least the "production" environment. All of the different environments are handled by maven profiles, so you might have to configure a bit during the following minutes.
Create the Database instances
First thing to do is to decide where to put all your stuff. The examples use derby out of the box and therefore you should either have the Java DB installed (part of the JDK) or use the GlassFish derby instance which is pre-configured with NetBeans. Let's make it harder here and assume we use the Java DB installation that comes with your JDK. Go ahead, open a CMD prompt and navigate to your %JAVA_HOME% folder and further down the db folder/bin. Execute the "startNetWorkServer" script and watch out for the derby instance to start. Now open another CMD prompt also navigate to the db/bin folder and execute the "ij" script. This should come up with a prompt " ij>. Now enter the following connect string:
connect 'jdbc:derby://localhost:1527/GALLERIATEST;create=true';
This command connects you to the derby instance and creates a GALLERIATEST database if it doesn't already exist. The Galleria example uses a handy little tool called dbdeploy as a database change management tool. It let's you do incremental updates to the physical database model which get tracked in a changelog table. (More about this later in the series). You have to create the changelog table:
CREATE TABLE changelog (
  change_number DECIMAL(22,0) NOT NULL,
  complete_dt TIMESTAMP NOT NULL,
  applied_by VARCHAR(100) NOT NULL,
  description VARCHAR(500) NOT NULL
);

ALTER TABLE changelog ADD CONSTRAINT Pkchangelog PRIMARY KEY (change_number);
You can redo the steps for any other instance you need (production, etc.) by simply changing the database name in the connect statement. And don't forget to create the changelog table in every instance.
And if you don't like this approach. Fire up NetBeans, switch to the services tab, select "New Connection" and add a new Java DB Network Connection with host:localhost, port:1527 and Database: GALLERIATEST;create=true. Set both user and password to "APP" and click "Test Connection". Select APP as the schema for your new DB. And you are done!

Create the GlassFish domain
We are running this from latest GlassFish. First thing to do now is to create a new domain. navigate to your GlassFish installation directory and goto glassfish3/bin and execute the following:
asadmin create-domain --portbase 10000 --nopassword test-domainThis creates a new test-domain for you. Now navigate to that domain folder ("glassfish3/glassfish/domains/test-domain") and open the config/domain.xml file.
We are now going to add the created derby database as a connection pool to you newly created GlassFish domain. Navigate to the <resources> element and add the following connection pool and jdbc-resource under the last closing </jdbc-connection-pool> element:
 <jdbc-connection-pool driver-classname="" datasource-classname="org.apache.derby.jdbc.ClientDataSource40" res-type="javax.sql.DataSource" description="" name="GalleriaPool" ping="true">
      <property name="User" value="APP"></property>
      <property name="DatabaseName" value="GALLERIATEST"></property>
      <property name="RetrieveMessageText" value="true"></property>
      <property name="Password" value="APP"></property>
      <property name="ServerName" value="localhost"></property>
      <property name="Ssl" value="off"></property>
      <property name="SecurityMechanism" value="4"></property>
      <property name="TraceFileAppend" value="false"></property>
      <property name="TraceLevel" value="-1"></property>
      <property name="PortNumber" value="1527"></property>
      <property name="LoginTimeout" value="0"></property>
    </jdbc-connection-pool>
    <jdbc-resource pool-name="GalleriaPool" description="" jndi-name="jdbc/galleriaDS"></jdbc-resource>
Now find the : <config name="server-config"> element and inside it look for the last <resource-ref entry. Add the following line there:
<resource-ref ref="jdbc/galleriaDS"></resource-ref>One last thing to do until we are ready to fire up our instance. We need to add the JDBC Realm for the Galleria example. again, find the <config name="server-config"> and inside it, look for a </auth-realm>. Under this, put the following:
  <auth-realm classname="com.sun.enterprise.security.auth.realm.jdbc.JDBCRealm" name="GalleriaRealm">
      <property name="jaas-context" value="jdbcRealm"></property>
      <property name="encoding" value="Hex"></property>
      <property name="password-column" value="PASSWORD"></property>
      <property name="datasource-jndi" value="jdbc/galleriaDS"></property>
      <property name="group-table" value="USERS_GROUPS"></property>
      <property name="charset" value="UTF-8"></property>
      <property name="user-table" value="USERS"></property>
      <property name="group-name-column" value="GROUPID"></property>
      <property name="digest-algorithm" value="SHA-512"></property>
      <property name="user-name-column" value="USERID"></property>
    </auth-realm>
Be sure not to put the new realm under the default-config. This will not work. Fine. Let's get the sources :)
Getting the Source and opening it in NetBeans

hg clone https://bitbucket.org/VineetReynolds/java-ee-6-galleriaor via the website download (upper right "get sources") or directly via NetBeans. You need a Mercurial client for your OS for the first and the third option. I am using TortoiseHg for Windows. You should have this installed and configured with NetBeans before doing the following. Lets try the last alternative here. Select "Team > Clone Other". Enter the Repository URL and leave user/password empty. Click "next" two times (we don't need to change default paths ;)) and select a parent directory to put the stuff in. Click "Finish" and let the Mercurial client do the work. You are asked to open the found projects after it finished. This should look similar to the picture on the right. If you run into connection troubles make sure to update your proxy settings accordingly.
If you try to build the project you will run into trouble. It is still missing some configuration which we are going to do next.
Adding a Development Profile
Next is to add some stuff to the Maven pom.xml of the galleria-ejb project. Open it and scroll down to the <profiles> section. You find two (sonar and production). We are going to add a development profile by adding the following lines to it (make sure to adjust the GlassFish paths to your environment):
<profile>
<id>development</id>
<activation>
<activeByDefault>true</activeByDefault>
</activation>
<properties>
<galleria.derby.testInstance.jdbcUrl>jdbc:derby://localhost:1527/GALLERIATEST</galleria.derby.testInstance.jdbcUrl>
<galleria.derby.testInstance.user>APP</galleria.derby.testInstance.user>
<galleria.derby.testInstance.password>APP</galleria.derby.testInstance.password>
<galleria.glassfish.testDomain.user>admin</galleria.glassfish.testDomain.user>
<galleria.glassfish.testDomain.passwordFile>D:/glassfish-3.1.2-b22/glassfish3/glassfish/domains/test-domain/config/local-password</galleria.glassfish.testDomain.passwordFile>
<galleria.glassfish.testDomain.glassfishDirectory>D:/glassfish-3.1.2-b22/glassfish3/glassfish/</galleria.glassfish.testDomain.glassfishDirectory>
<galleria.glassfish.testDomain.domainName>test-domain</galleria.glassfish.testDomain.domainName>
<galleria.glassfish.testDomain.adminPort>10048</galleria.glassfish.testDomain.adminPort>
<galleria.glassfish.testDomain.httpPort>10080</galleria.glassfish.testDomain.httpPort>
<galleria.glassfish.testDomain.httpsPort>10081</galleria.glassfish.testDomain.httpsPort>
</properties>
</profile>
Ok. As you can see a couple of stuff is defined here. And the profile is activated by default. That's it. For now.
Testing the ejb-Galleria Project
Lets try to run the testcases in the ejb-Galleria project. Right click it and issue a "clean and build".Follow the console output to see what is actually going on. We are going to investigate this a little bit further with one of the next posts. Today we are only doing this to make sure, you have everything setup the right way. It should finish with:
Tests run: 49, Failures: 0, Errors: 0, Skipped: 0
BUILD SUCCESS
That is a "Green-Bar" :-) Congratulations!
Build and Deploy the Project
Now go to NetBeans "Tools > Options > Miscellaneous > Maven" and check the box that says: "Skip Tests for any build executions not directly related to testing". Return to the main window and right click the Galleria project and make a clean and build there.
Reactor Summary:

Galleria ................................. SUCCESS [0.431s]
galleria-ejb ............................. SUCCESS [5.302s]
galleria-jsf ............................. SUCCESS [4.486s]
Galleria EAR ............................. SUCCESS [1.308s]
------------------------------------------------------------
BUILD SUCCESS
------------------------------------------------------------
Total time: 11.842s
Fine. Now lets fire up the GlassFish domain. Switch to your GlassFish installation and find the glassfish3/bin folder. Open a command line prompt there and run:
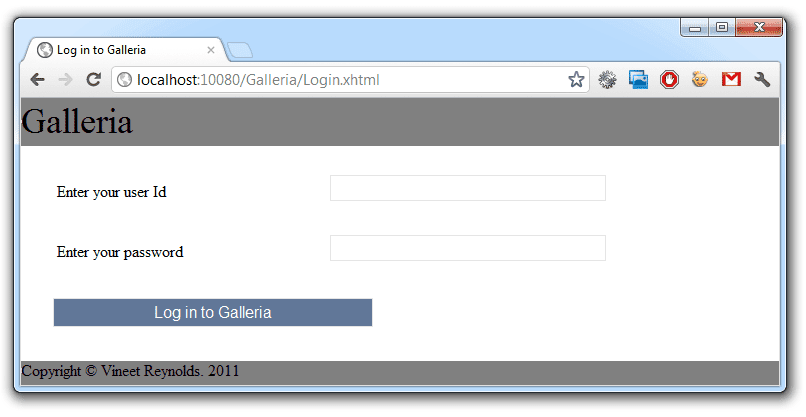
asadmin start-domain test-domainYou can see the domain starting up. Now open a browser and navigate to http://localhost:10048/. After a few seconds this is going to show you the admin console of your GlassFish server. Now you need to install Hibernate. Select the "Update Tool" (bottom left) and switch to the "Available Add-Ons" tab. Select "hibernate" and click install (top right). Stop the server after you installed it and restart it with the command above. Open the admin console again and click on "Applications". Click the little "deploy" button on top and browse for the "java-ee-6-galleria/galleria-ear/target/galleria-ear-0.0.1-SNAPSHOT.ear". Click on "OK" (top right). You are done after a few seconds. Now switch to http://localhost:10080/Galleria/ and you will see the welcome screen. Congratulations. You setup the Galleria example on GlassFish! Sign up, Login and play with the application a bit!
The next parts in the series will dive you into the details of the application. I am going to cover the tests and overall concepts. And we are also going to change both JPA provider and database in a future post.
Want to know what it takes to get it up and running on latest WebLogic 12c ? Read on!

Comments
Very good sample.
But I think this is a little bit hard to beginners to build and run the project!
I thinks if you make these changes it will be easier for beginners and even professionals to setup and run the project!
-Glassfish has a default domain which named domain1 so you can use it for both test and production and remove the phase of creating domains in tutorial.
-Glassfish has a default resource which is named jdbc/sample (I think) so you can use it and avoid defining another jdbc resource. or put the jdbc resource definition xml inside glassfish-resources.xml
Again thanks for setting up this great sample.
I'm passionate to see the next tutorials related to this sample.
thanks for your comment. I was actually thinking about doing it _more beginner frindly_. The problem with that is, that you rely on a couple of things that you don't have with other appservers. In the following posts I am not only going to _port_ it to e.g. WebLogic but also change the JPA implementation and database. You as a reader should have a good base for that.
Thanks for your comment,
-M
The primary purpose was to have the ability to recreate environments from scratch. I've worked with Derby for a sufficient period of time to have experienced database corruptions in a very short span. Having the ability to blow away a Derby instance and recreate it in a few moments allows you to react rapidly to corrupted dev and test environments.
Then there's the other part of ensuring that your development environment is almost or exactly the same as your production one. Also, I prefer having isolated development environments instead of developing on the same container that hosts other applications; this allows you to recreate environments like I stated above. By using the default GlassFish domain, the ability to address these concerns cannot demonstrated in a project.
I sign up and then try to login
"The user name or password is incorrect."
seems as if you did something wrong with the realm configuration. The glassfish logs should tell you.
-M
"The user name or password is incorrect."
Looks weird but Then I removed pasted XML and made a realm using glassfish admin console and restarted glassfish and it worked!
galleria.derby.testInstance.jdbcUrl
I would think that it would make more sense to name variables the same, but have the values change for the specific profile.
galleria.derby.jdbcUrl
This way when you reference those properties in a plugin, the values that populate will depend on the profile that's active.
Thanks for your thoughts. Completely right. Don't know if vineet accepts contributions but that would be a good one.
-m
But after I entered my userId and password and clicked 'Sign up' button I received error:
Caused by: java.util.MissingResourceException: Can't find bundle for base name resources.messages, locale ru_RU
at java.util.ResourceBundle.throwMissingResourceException(ResourceBundle.java:1499)
at java.util.ResourceBundle.getBundleImpl(ResourceBundle.java:1322)
at java.util.ResourceBundle.getBundle(ResourceBundle.java:724)
at info.galleria.i18n.Messages.(Messages.java:9)
... 49 more
-m
Thank you for this helpful review! Unfortunately I keep running into one problem when deploying. My ear always contains the wrong persistence.xml, resulting in this error:
Error occurred during deployment: Exception while preparing the app : The persistence-context-ref-name [info.galleria.service.jpa.AlbumRepository/em] in module [galleria-ear-0.0.2-SNAPSHOT#galleria-ejb-0.0.2-SNAPSHOT.jar] resolves to a persistence unit called [galleria-ejb] which is of type RESOURCE_LOCAL. Only persistence units with transaction type JTA can be used as a container managed entity manager. Please verify your application.. Please see server.log for more details. Exception while invoking class org.glassfish.persistence.jpa.JPADeployer prepare method : java.lang.RuntimeException: The persistence-context-ref-name [info.galleria.service.jpa.AlbumRepository/em] in module [galleria-ear-0.0.2-SNAPSHOT#galleria-ejb-0.0.2-SNAPSHOT.jar] resolves to a persistence unit called [galleria-ejb] which is of type RESOURCE_LOCAL. Only persistence units with transaction type JTA can be used as a container managed entity manager. Please verify your application. The persistence-context-ref-nam .... msg.seeServerLog
I followed your instruction step by step - probably the code has evolved since your writing? Any hints how to provide the correct persistence unit in the ear deployment are appreciated :-)
Best
Christoph
Hadn't had a chance to look. Trying to do this during the next weeks.
-m
Your problem is very likely related to the execution of package goal for the ear project and the maven-antrun-plugin used in the ejb project. This is possible if you're working off an IDE that doesn't handle the presence of the maven-antrun-plugin used in the ejb project. The maven-antrun-plugin is declared to copy over the persistence.xml file with a test-persistence.xml (that contains the resource_local PU) and then revert the changes back. Sometimes, the IDE doesn't run the second bit before packaging up the jar, leaving you with a failing deployment. This issue would be best fixed by running 'mvn package' (or 'mvn install') without workspace resolution; this leaves Maven in charge of the entire build.
Let me know if that fails as well. I'm moving over all of the tests to Arquillian so that this bit of wizardry is not required.
Vineet
Thanks for your fast response! The problem is still there even without using any ide. I just tried:
1) Configured everything like described here https://bitbucket.org/VineetReynolds/java-ee-6-galleria/wiki/SettingUpTheApplication (standalone maven 3.0.4, derby 10.8.22, GF 3.2.1, jdk 1.6.0_37)
2) Cloned the repository from bitbucked
3) Called "mvn package"
4) Tried to deploy the galleria-ear-0.0.2-SNAPSHOT.ear via GF admin webinterface
Still the same error :-( Glad to hear you will port it to Arquillian. What is your plan to do so? I just reviewed Arquillian and plan to use it. But for now I need to get familiar with EE in general first. Maybe I can contribute to the example later on.
Chris
Running info.galleria.utilities.PasswordUtilityTest
03.12.2012 11:34:12 info.galleria.utilities.PasswordUtility getDigest
SCHWERWIEGEND: Failed to decode the provided password into a sequence of UTF-8 bytes.
java.nio.charset.MalformedInputException: Input length = 1
at java.nio.charset.CoderResult.throwException(CoderResult.java:260)
at java.nio.charset.CharsetEncoder.encode(CharsetEncoder.java:781)
at info.galleria.utilities.PrimitiveArrayConverter.convertCharArrayToBytes(PrimitiveArrayConverter.java:44)
at info.galleria.utilities.PasswordUtility.getDigest(PasswordUtility.java:42)
at info.galleria.utilities.PasswordUtilityTest.testCreatePasswordDigestOfInvalidUTF16Sequence(PasswordUtilityTest.java:75)
at sun.reflect.NativeMethodAccessorImpl.invoke0(Native Method)
at sun.reflect.NativeMethodAccessorImpl.invoke(NativeMethodAccessorImpl.java:39)
at sun.reflect.DelegatingMethodAccessorImpl.invoke(DelegatingMethodAccessorImpl.java:25)
at java.lang.reflect.Method.invoke(Method.java:597)
at org.junit.runners.model.FrameworkMethod$1.runReflectiveCall(FrameworkMethod.java:44)
at org.junit.internal.runners.model.ReflectiveCallable.run(ReflectiveCallable.java:15)
at org.junit.runners.model.FrameworkMethod.invokeExplosively(FrameworkMethod.java:41)
at org.junit.internal.runners.statements.InvokeMethod.evaluate(InvokeMethod.java:20)
at org.junit.internal.runners.statements.ExpectException.evaluate(ExpectException.java:21)
at org.junit.runners.BlockJUnit4ClassRunner.runNotIgnored(BlockJUnit4ClassRunner.java:79)
at org.junit.runners.BlockJUnit4ClassRunner.runChild(BlockJUnit4ClassRunner.java:71)
at org.junit.runners.BlockJUnit4ClassRunner.runChild(BlockJUnit4ClassRunner.java:49)
at org.junit.runners.ParentRunner$3.run(ParentRunner.java:193)
at org.junit.runners.ParentRunner$1.schedule(ParentRunner.java:52)
at org.junit.runners.ParentRunner.runChildren(ParentRunner.java:191)
at org.junit.runners.ParentRunner.access$000(ParentRunner.java:42)
at org.junit.runners.ParentRunner$2.evaluate(ParentRunner.java:184)
at org.junit.runners.ParentRunner.run(ParentRunner.java:236)
at org.apache.maven.surefire.junit4.JUnit4TestSet.execute(JUnit4TestSet.java:35)
at org.apache.maven.surefire.junit4.JUnit4Provider.executeTestSet(JUnit4Provider.java:146)
at org.apache.maven.surefire.junit4.JUnit4Provider.invoke(JUnit4Provider.java:97)
at sun.reflect.NativeMethodAccessorImpl.invoke0(Native Method)
at sun.reflect.NativeMethodAccessorImpl.invoke(NativeMethodAccessorImpl.java:39)
at sun.reflect.DelegatingMethodAccessorImpl.invoke(DelegatingMethodAccessorImpl.java:25)
at java.lang.reflect.Method.invoke(Method.java:597)
at org.apache.maven.surefire.booter.ProviderFactory$ClassLoaderProxy.invoke(ProviderFactory.java:103)
at $Proxy0.invoke(Unknown Source)
at org.apache.maven.surefire.booter.SurefireStarter.invokeProvider(SurefireStarter.java:145)
at org.apache.maven.surefire.booter.SurefireStarter.runSuitesInProcess(SurefireStarter.java:87)
at org.apache.maven.surefire.booter.ForkedBooter.main(ForkedBooter.java:69)
03.12.2012 11:34:12 info.galleria.utilities.PasswordUtility getDigest
SCHWERWIEGEND: No implementation of SHA-000 was found. Check your Java Security provider configuration.
I followed everything else in this blog and I am able to see the login page of the application.
My only problem is that during authentication, it always says 'Failed to authenticate user' even if the user is there in the database.
Could there be a problem? I used glassfish 3.1.2 and apache derby.
There seems to be some authentication problem I think and it cannot validate against the jdbc realm...
hard to tell without any exception.
Can you try to raise the security logging level (GF console) and email me with the exception?
Thanks,
- M
Now find the : element and inside it look for the last but it does not work.
Maybe you are referring to this
..thats where I place the resource-ref and it worked.
..I am now able to authenticate. Can you cross checked?
Thanks